Working offline with volatility3
March 2023 (470 Words, 3 Minutes)
Creating Volatility 3 symbols For specific OS
INTRODUCTION
Volatility 3, as I had discussed previously, uses symbol tables to map memory for a given memory image. Symbol tables contain the memory addresses of functions and data structures, as well as their associated symbols, which can be used to identify them in memory. They aid in identifying system-level artifacts, such as kernel drivers, libraries, and processes. They can be stored as .json files, or in compressed format as .json.gz, .json.xz, or .zip.
Volatility3 decompresses them during use. During usage, symbol tables are cached(compressed) and stored under the user’s home directory, in the dir .cache/volatility3.. In this blog, we are going to discuss how to create these symbol tables offline and use them to analyze a memory image.
WINDOWS SYMBOL TABLES
In windows systems, Volatility takes a string containing the GUID and Age of the required PDB file. The tool then searches for all files in the symbol directories configured under the windows subdirectory. If any contains metadata that matches the PDB name and GUID or age, it is then used as a symbol table. If none can be found, then the required PDB file is downloaded from Microsoft’s Symbol Server and converted into the needed JSON format.
Therefore, without an internet connection, Windows symbol tables can still be manually constructed, given an appropriate PDB file. The tool utilized for this conversion is called pdbconv.py and luckily, it’s prebuilt with volatility3. To utilize it, you only need to run the following command:
Python volatility3/framework/symbols/windows/pdbconv.py
But first things first, let’s get into how we can go about creating a windows symbol table.
Creating Windows Symbol table.
First, we need to identify which is the best pdb file for the memory image we are analyzing. Luckily, this is easy using volatility3 since there is a plugin to literally provide instructions on how to fetch a pdb.
You just need to run the command
Vol3 -f memorydump.bin -v windows.info
The result is as shown below:
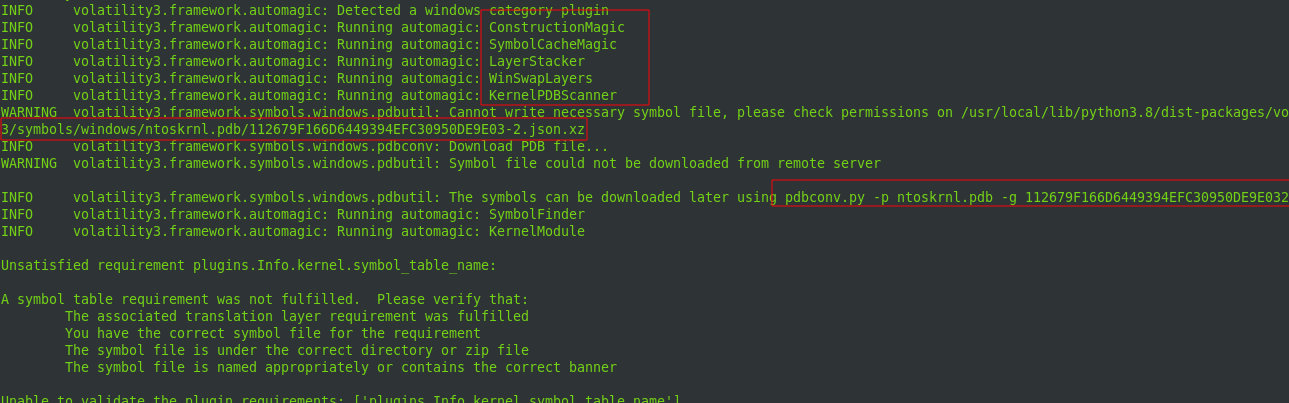
The plugin just makes our work easier by providing the values we need to download a pdb file for our memory image. Let’s understand what flags the command provided by volatility3 uses. The -p flag represents the pdb file and the -g flag consists of a “[GUID, AGE]” value. This is the technique Microsoft maintains and manages symbol files with these values, and thus you need to specify PDB, GUID, and AGE in the URL to download a specific Symbol file. Here is a construct of a URL to download the pdb file in our case:
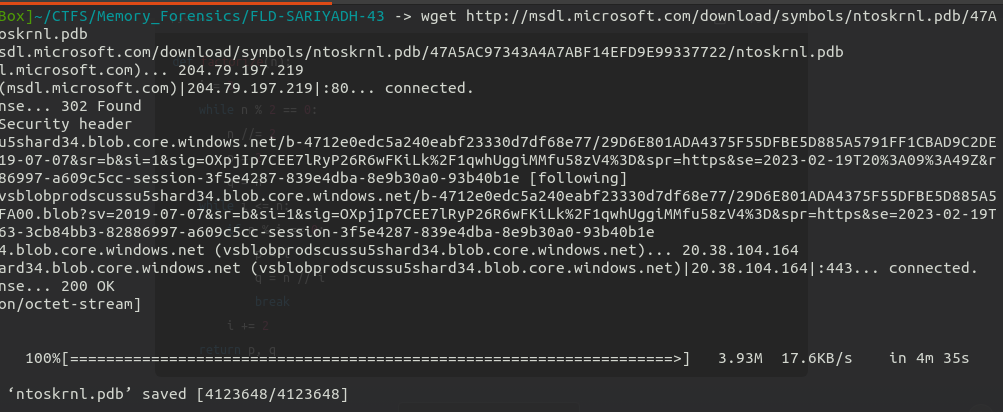
http://msdl.microsoft.com/download/symbols/ntoskrnl.pdb/47A5AC97343A4A7ABF14EFD9E99337722/ntoskrnl.pdb
We can therefore go ahead and download the pdb using “wget” or your preferred tool.
Next, we use the pdbconv.py script to create a symbol table using the pdbfile as follows:
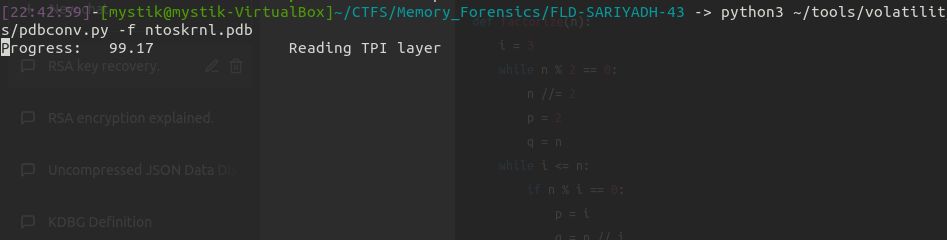
The file will be saved on json.xz format:

Move the symbol table to the directory:
volatility3/volatility3/symbols/windows/ntkrnlmp.pdb/
Alternatively, you can direct volatility 3 to the symbols directory using the ‘-s’ option.
$ ls symbol-dir/windows/ntkrnlmp.pdb/47BA5AC97343A4A7ABF14EFD9E9933772-2.json.xz
python3 vol.py -f test.mem -s symbols-dir windows.info
Flex your symbol to find out if it works with the memory image!!
CREATING LINUX SYMBOL TABLES
It is not possible to create a symbol table in Volatility 3 using a Volatility 2 profile. To create a symbol table, you can clone the dwarf2json repository, which allows you to generate a JSON file from an ELF file.
You will also need to download the debug symbols from the target Linux kernel and install them in a docker container that matches the target operating system.
Once you have generated the symbol table, you can move it to the Volatility3 symbols directory and check that Volatility has loaded it using the
volatility3 -f dump.raw linux.pstree.PsTree command
RESOURCES
- https://beguier.eu/nicolas/articles/security-tips-3-volatility-linux-profiles.html#:~:text=Generating%20a%20profile%20for%20Volatility%203&text=First%2C%20you%20need%20to%20clone,before%20running%20the%20docker%20container.&text=Then%20you%20need%20to%20download,from%20the%20target%20Linux%20kernel.